Salesforce OAuth 2.0 Web Server Flow Authorisation with Postman
Mike Arthur • 26 April 2020
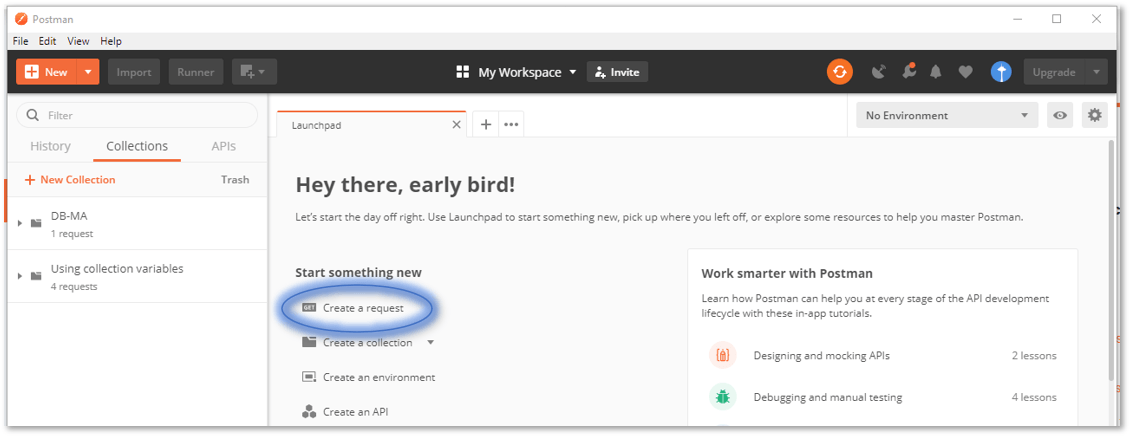
As it says at postman.com
‘Postman is a collaboration platform for API development. Postman's features simplify each step of building an API and streamline collaboration so you can create better APIs—faster.’
It’s a free, downloadable client app currently used by 10 million developers across 500,000 companies.
To demonstrate the process I’m going to use the Connected App from the Trailhead module ‘Build a Connected App for API Integration’ and the ‘Use REST API’ unit.
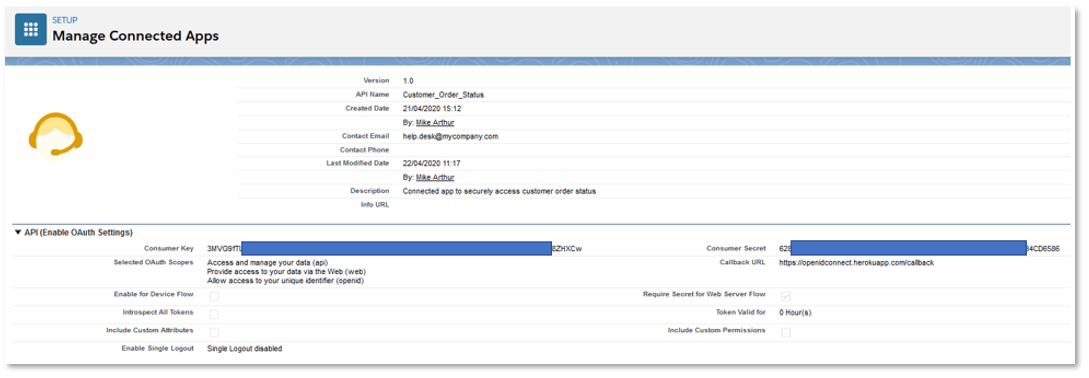
Now we need some values from the OAuth settings of the Connected App. To get back to those settings in your Salesforce org, go to Setup and click on App Manager, then click the dropdown next to your Connected App on the far right and select ‘View’:

You will need the ‘Consumer Key’, ‘Consumer Secret’ (click to reveal it) and the ‘Callback URL’:
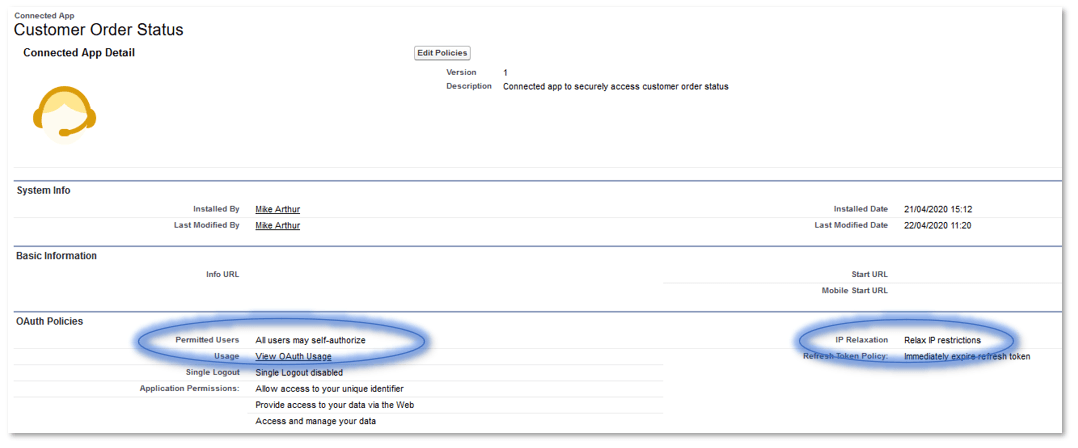
Whilst in the org, click on App Manager again and this time click ‘Manage’ in the dropdown on the right next to your Connected org. For this demo, set ‘Permitted Users’ to ‘All users may self-authorize’ and set ‘IP Relaxation’ to ‘Relax IP restrictions’. These may have been set to different values during the Trailhead module.
Postman will also need values for an Authorization URL and Access Token URL:
- Find your ‘domain’, it’s the part between ‘https://’ and ‘.lightning.force.com’ when you look at the address of a page in your org. E.g. for an Account in my Trailhead Playground –
https://cunning-bear-pw9vyc-dev-ed.lightning.force.com/lightning/r/Account/0011t0000081O5vAAE/view
- For the Auth URL, Replace ‘MyDomain’ with your domain here:
https://MyDomain.my.salesforce.com/services/oauth2/authorize
- Do the same for the Access Token URL:
https://MyDomain.my.salesforce.com/services/oauth2/token
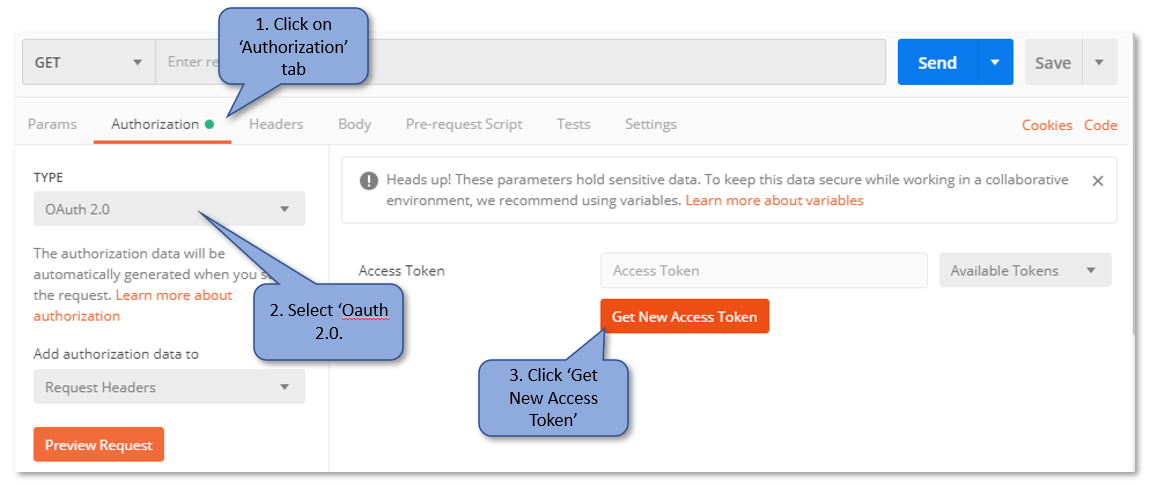
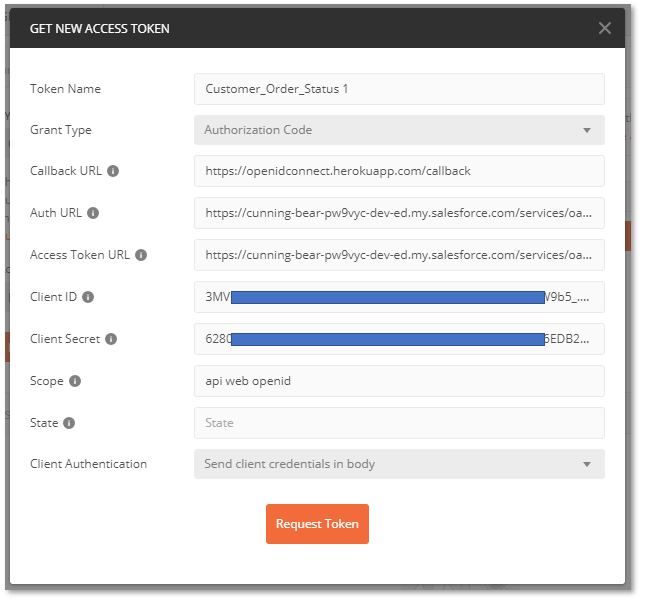
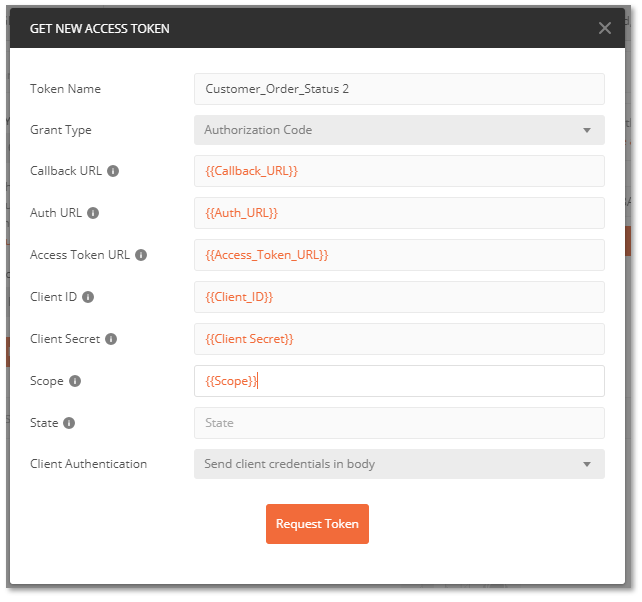
Now you can fill in the blanks in Postman for the OAuth 2.0 values:
- Token Name can be anything you like, it allows you to retrieve the token later
- Fill ‘Client ID’ with your ‘Consumer Secret’ and ‘Client Secret’ with your ‘Consumer Secret’
- For ‘Scope’ I matched the values with the ‘Selected OAuth Scopes’ of my Connected App, using the value in brackets for each one, separated by a single space
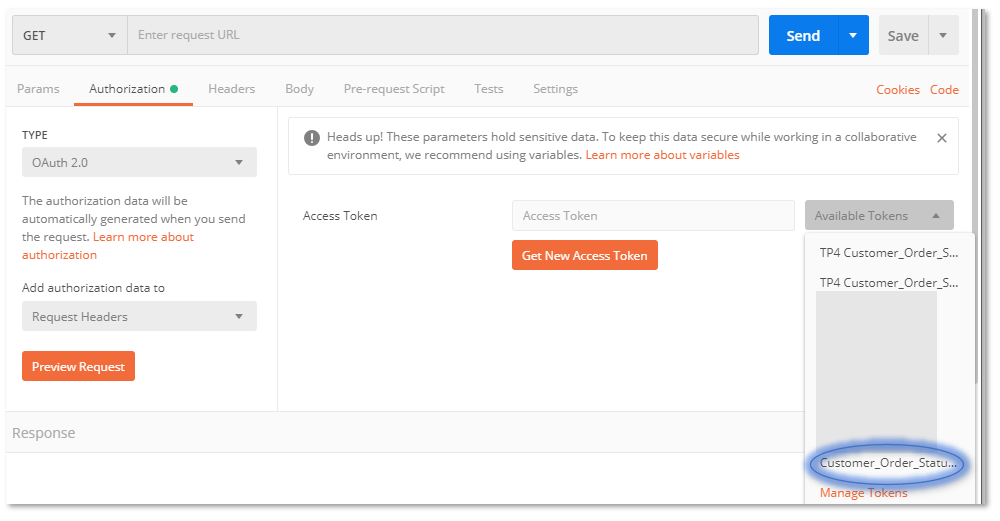
Click on ‘Request Token’. You will be prompted for your org login. Login and allow the connection if prompted.

Now, from the ‘Available Tokens’ dropdown, select the token just generated. They are named by the ‘Token Name’ that you gave it when generating it:
A request, based on the ‘Use REST API’ Trailhead unit can now be sent to get details of an Account:
- For the ‘Get’ request, enter
https://MyDomain.my.salesforce.com/services/data/v48.0/query/?q=SELECT+Id, Name+From+Account+WHERE+AccountNumber='CD656092'
Use a query filter which will return data for your org and replace ‘MyDomain’ with your domain:
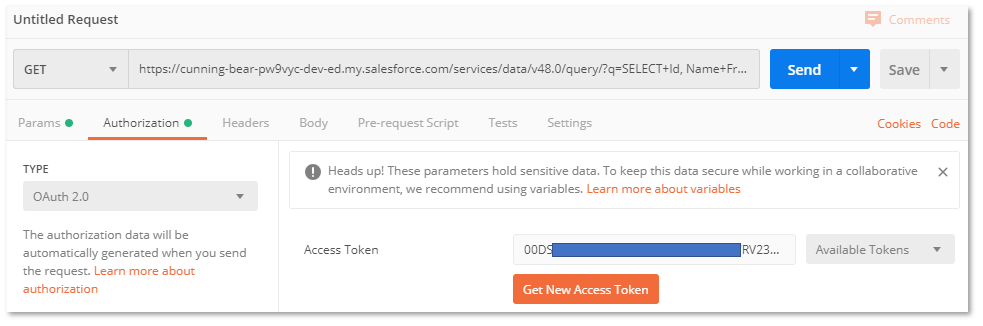
Press ‘Send’ and you will get the JSON response:
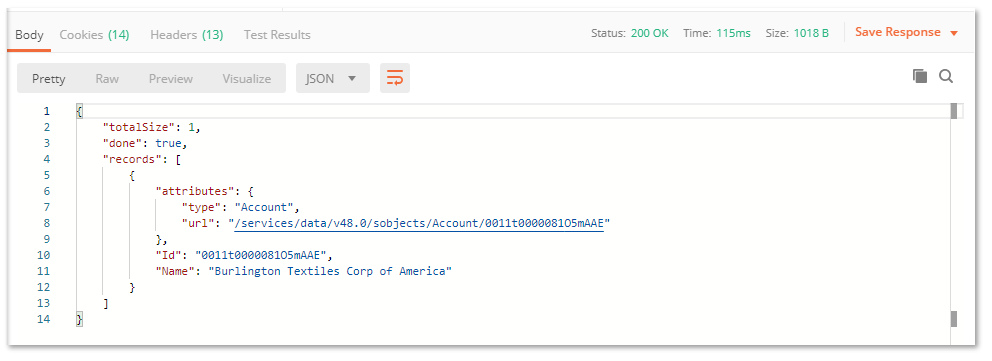
Hopefully you will have that very satisfied feeling when it works 😊
To take it a step further and get a little deeper into Postman, click where it says ‘Learn more about variables’:
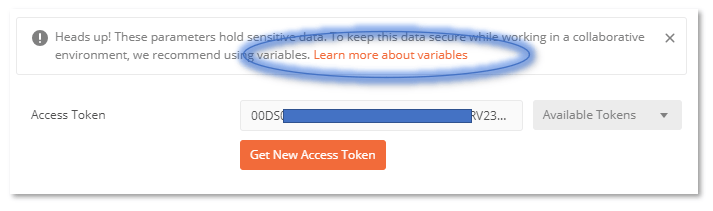
Find out about variables and environments, then instead of having to paste in all that pesky guff each time you want a token, you can refer to variables like this:
My Blog of Salesforce Stuff
'XHR Failed' error when trying to install VS Code extension
What is $A (dollar A) in Lightning Aura component framework? Is it a global variable? Where are the docs for $A?
Authorise a Salesforce Connected App using OAuth 2.0 JWT Bearer Flow

How to create a Lightning tab menu with dropdown sub-menu

How to show a month by month trend chart with multiple years on same chart
What to do if you receive emails about expiring certificates

Process json strings when working with integrations
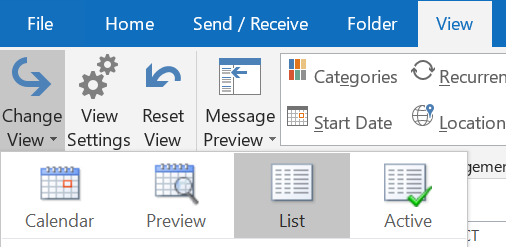
If you're switching email accounts you can copy appointments from one calendar to the other
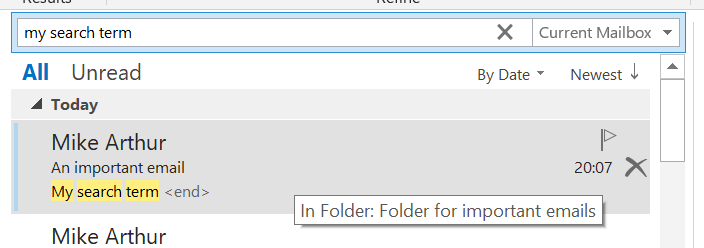
When you search in Outlook 2016, how do you see in which folder you filed an email in the results?
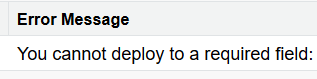
A change set or ant deployment will fail if a field that is required in the field definition is included in a profile or permission set that is being deployed